A perfectly cooked steak is the jewel of any backyard barbecue. The reverse sear method has revolutionized how grill enthusiasts achieve that ideal balance: a uniformly pink interior crowned with a savory, caramelized crust. In this expanded guide, we’ll explore the science of the reverse sear, step-by-step instructions, advanced flavoring tips, and troubleshooting advice to guarantee steakhouse results in your own backyard.
Why Reverse Sear?
Traditional searing first can cause uneven doneness, with an overcooked outer layer and an undercooked center. The reverse sear solves this by starting your steak at a lower temperature until it’s nearly at the desired internal doneness. Only then do you sear it over high heat. The result is a perfectly even cook from edge to edge.
Pro Tip: The reverse sear works best with thicker cuts (1.5 inches or more), such as ribeyes, porterhouses, or strip steaks.
Step-by-Step Guide to the Reverse Sear
-
Season & Temper: Generously season the steak with salt and pepper or your favorite rub. Let it sit at room temperature for about 30–45 minutes before cooking.
-
Low & Slow Start: Place the steak on the indirect heat side of your grill. Maintain a temperature around 225–275°F. Close the lid and cook until the steak’s internal temperature is about 10–15°F below your target doneness.
-
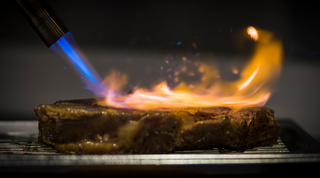
High-Heat Finish: Move the steak over direct, high heat (500–600°F). Sear each side for 1–2 minutes to develop a rich crust.
-
Rest & Slice: Allow the steak to rest for 5–10 minutes. This redistributes the juices, ensuring every bite is tender and flavorful.
Tools & Techniques for Precision
-
Instant-Read Thermometer: A must-have for checking internal temperatures.
-
Two-Zone Fire: Creates stable low heat on one side and intense high heat on the other.
-
Quality Tongs: For flipping without piercing the meat and losing valuable juices.
Flavor Accents & Add-Ons
-
Compound Butters: Mix softened butter with herbs, garlic, or blue cheese to top your steak.
-
Finishing Salts: A sprinkle of flaky sea salt just before serving enhances flavor and texture.
-
Sauces & Marinades: A quick drizzle of chimichurri or bordelaise elevates your reverse-seared steak to gourmet status.
Troubleshooting Common Issues
-
Underseasoning: Don’t be shy with salt and pepper—it’s hard to overdo it with a thick steak.
-
Overcooking: Use your thermometer. Residual cooking will raise the internal temp by a few degrees during the rest. Pull the steak off slightly early to avoid going over your target doneness.
-
Lack of Sear: Ensure the final searing stage is blazing hot. Preheat your grill grates and consider using a cast iron skillet for maximum crust.
FAQs: Reverse Searing
Q: Can I reverse sear on a gas grill?
A: Yes. Simply light one burner for low heat and preheat the other burner on high for searing.
Q: Is reverse sear only for steaks?
A: While it’s most popular for steaks, you can apply the technique to thick chops or even certain roasts.
Q: Does resting really matter?
A: Absolutely. Resting ensures the juices redistribute throughout the meat, resulting in a juicier, more tender bite.
Mastering the reverse sear opens the door to consistently perfect steaks. This modern technique combines precision, patience, and high-heat drama to produce results that rival any upscale steakhouse. With the right tools, seasonings, and a bit of practice, you’ll be wowing friends and family with tender, flavorful steaks they’ll never forget.


