There’s a reason top steakhouses charge a premium for dry-aged beef: the process concentrates rich, meaty flavors and tenderizes the steak, resulting in an unparalleled dining experience. But you don’t need a high-end restaurant to enjoy these mouthwatering results. With the right steps, you can dry-age at home and finish your masterpiece on a propane or natural gas grill, achieving that perfect, steakhouse-quality crust and flavor. In this guide, we’ll walk you through the dry-aging process, selecting the best cuts, safe handling techniques, and the ideal grilling methods to bring out the finest taste and texture.
Understanding Dry-Aging
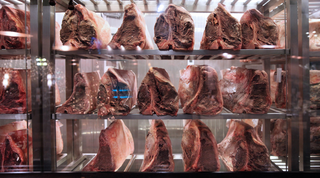
Dry-aging isn’t just about waiting—it’s a controlled process of letting beef rest in a temperature- and humidity-controlled environment. As the meat ages, enzymes break down muscle fibers, enhancing tenderness and developing complex, nutty, and buttery flavors. Typically done with larger subprimal cuts, dry-aging concentrates the meat’s essence while shedding excess moisture.
Pro Tip: Consider starting small. Begin with a ribeye roast or a strip loin to practice before investing in larger, pricier cuts.
Setting Up a Home Dry-Aging Environment
-
Temperature Control: Aim for a steady 34–38°F. A dedicated mini-fridge or dry-aging refrigerator kit ensures consistent conditions.
-
Humidity Management: Keep humidity around 80–85% to prevent the meat from drying out too quickly.
-
Airflow & UV Light: Proper airflow and an antimicrobial light (in some setups) help prevent spoilage.
Safety Note: Always use high-quality, USDA Prime or Choice beef from a trusted source. Trim away any hardened or overly dark exterior before grilling.
Selecting the Perfect Cut
Ribeyes and strip loins are the most commonly dry-aged cuts. Their marbling and size make them ideal candidates. After aging (typically 21–45 days, depending on preference), you’ll trim off the crusty exterior to reveal beautifully concentrated meat beneath.
Grilling Dry-Aged Steaks to Perfection
-
Temper the Steak: Let it rest at room temperature for about 30–45 minutes before grilling.
-
Season Simply: A sprinkle of kosher salt and freshly cracked pepper highlights the dry-aged flavor.
-
High-Heat Sear: Preheat your gas grill’s sear burner or power burner to achieve a quick, flavorful crust. Sear each side for 1–2 minutes.
-
Indirect Finish: Move the steak to indirect heat until it reaches your target internal temperature, usually 125–130°F for medium-rare.
-
Rest & Slice: Let the steak rest 5–10 minutes. Slice against the grain and serve with a simple finishing salt.
Recommended Tools
-
Instant-Read Thermometer: For precise doneness.
-
Dedicated Dry-Aging Setup: A small fridge, dry-aging bags, or specialized dry-aging kits.
-
Quality Tongs & Spatula: To handle steaks gently.
FAQs: Dry-Aging at Home
Q: Can I dry-age individual steaks?
A: It’s best to dry-age larger cuts and then portion them into steaks after aging. Individual steaks lose moisture too quickly and can spoil more easily.
Q: How do I know if it’s spoiled?
A: If you detect an overpowering sour or rancid odor, or see slimy textures and unusual mold (green or black, not the expected white), discard the meat.
Q: Does dry-aging reduce cooking time?
A: Dry-aged steaks may cook slightly faster due to reduced moisture. Always rely on a thermometer to ensure accurate doneness.
Dry-aging at home is a culinary adventure that rewards patience and attention to detail. By following proper safety measures, selecting the right cuts, and finishing with skillful grilling techniques, you’ll impress guests with a flavor that rivals your favorite steakhouse. Your gas grill, combined with quality beef and careful aging, can truly transform a special meal into an unforgettable dining experience.
